
What is it?
For a really simple introduction, check out my earlier post on an Introduction to Node and npm.
Node is a javascript runtime environment outside your browser.
It is a program that embeds Chrome’s V8 engine into a command line executable that lets you run javascript.
You can download and install it from Nodejs.Org
So what?
Node comes with a package manager - npm, node package manager. that allows you to publish and download packages from npmjs.com, a web portal that allows developers to share their re-usable javascript modules. It has inherent support for both CommonJS and ECMAScript modules. When you download and install node, you’ll get node executable and also the node package manager.
How can I run node?
There are many ways to execute your javascript programs in Node. Let us first take a look at the REPL mode - Read, Eval, Print Loop. Now that isn’t a complicated concept at all. REPL, does exactly what it’s expanded form means, it reads everything you type from the command line, evaluates it, and prints the result. If what was type isn’t an expression that can be evaluated or doesn’t have a value on evaluation, like if it was a statement, then it prints undefined.
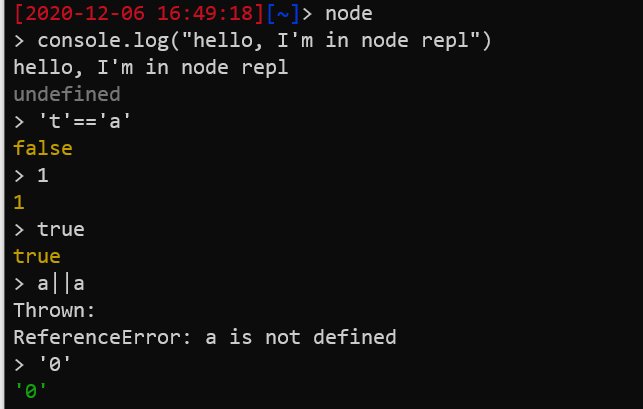
In the screenshot above, the first line after starting the REPL, says a console.log("hello, I'm in node repl"). Although it executes the line and prints the string given to console.log, there no return value on executing that statement, hence it prints an undefined straight after.
In the lines following that, I have written a few expressions that can be evaluated and will hence result in a value, which will immediately be printed out on the screen.
You could even write functions in there.
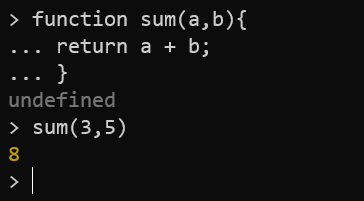
Node’s REPL mode is clever enough to identify that you are writing multiline code and waits for you to finish an execution block. If you have used your browser console a lot, you’ll be feeling at home here. So if you ever press enter and see the ellipsis (the three dots together on the beginning of the line), you know the repl is now in multiline mode, waiting for the block to close.
There is more you can do here. You can seek help inside this environment by typing .help
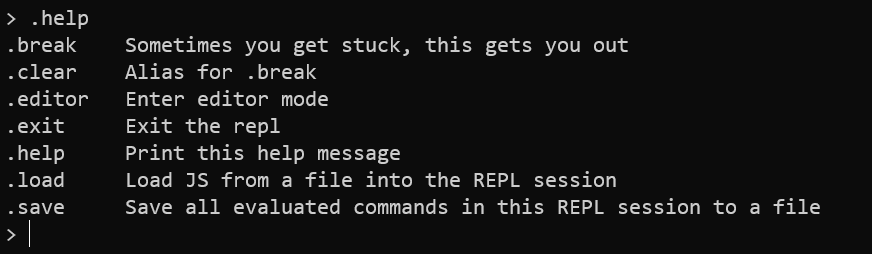
Pretty straightforward messages about what each command means. The editor mode is like a buffer that starts and waits for you to type as much as you want without evaluating on every new line.
Save is another useful method that will help you save your session into a file.
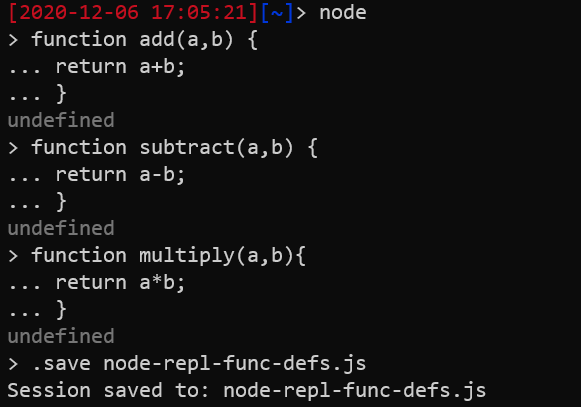
Here I’ve saved all my rather useless function definitions into a file for demonstrating this.
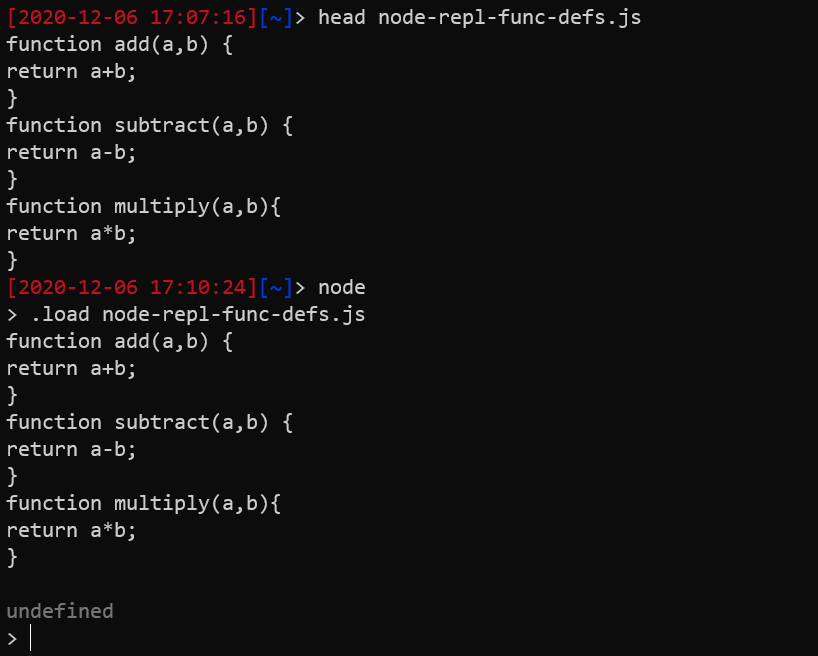
This can be useful in cases where you have written down some cool snippets, which you want to later use in another node session. You could load the stuff you defined in this file in the new session using, .load filename
If you have written js snippets, you don’t always have to run it in REPL mode, you can always execute node in the command line of your shell and pass the file as an argument.

If the file had something that it would print on the screen, you’d be able to view it just as you would if you had executed the lines of code inside a REPL environment.
Node CLI
The node cli accepts a variety of options. Some of it might be extremely useful for a quick check. You could view a whole list of options that it supports by using node -h

There are some interesting options, to directly override the V8 engine’s behaviour that node command line accepts. You can view them using node --v8-options --help | less. I’m only piping the results to less because the list of options are huge and less helps you scroll up and down the page.
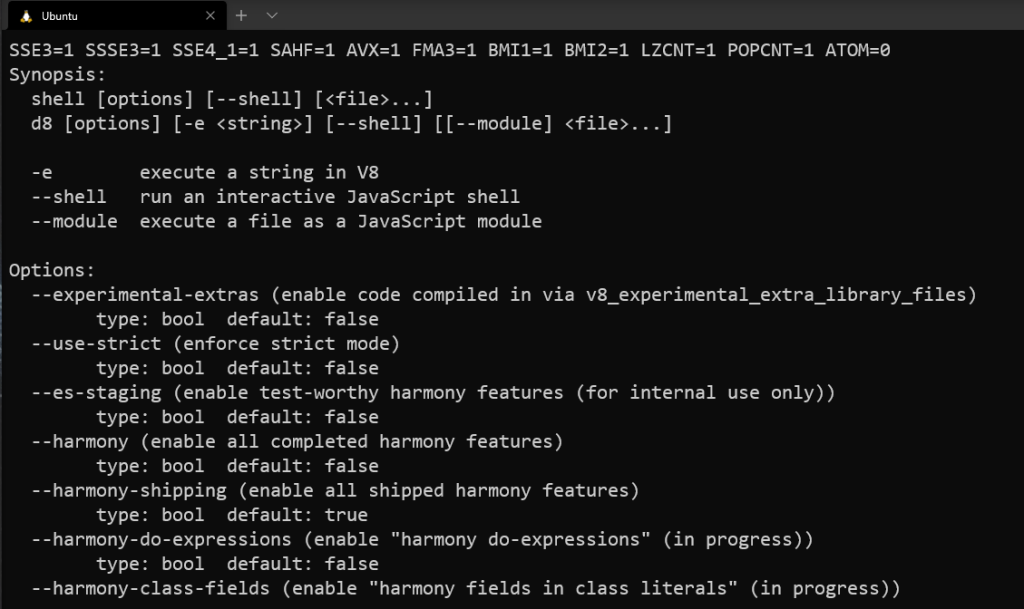
You might have noted, a list of options with harmony in their name. It is apparently a convention used for features that are currently being tested and could be buggy.
Setting an Environment variable, that node understands will result in a change of behaviour. You can view a full list of environment variables that node understands/supports by running node -h | less and going to the end.
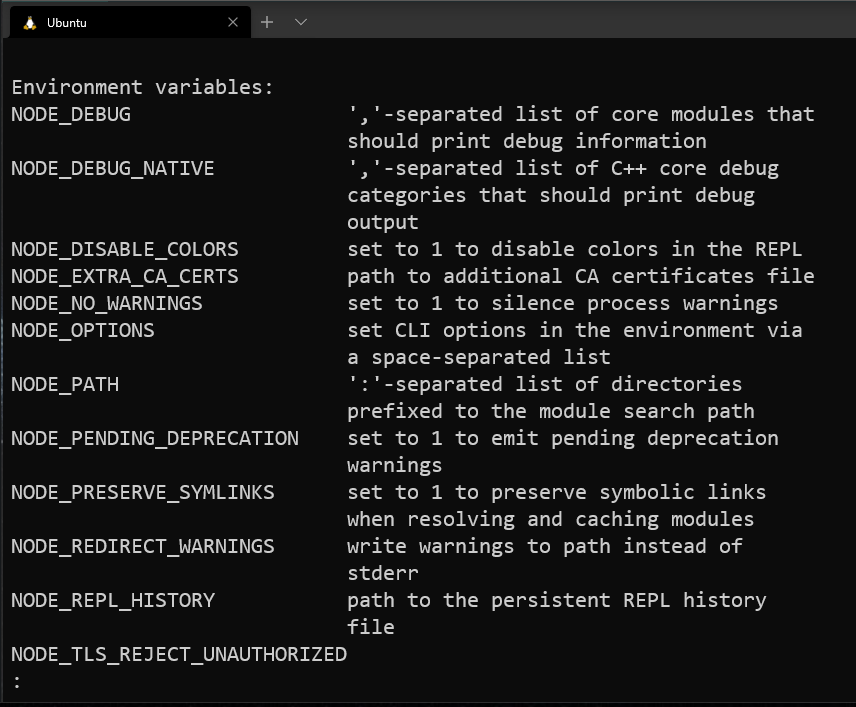
The NODE_DEBUG environment variable is a useful one to print out useful debug information out of the box. Sort of like default logging.
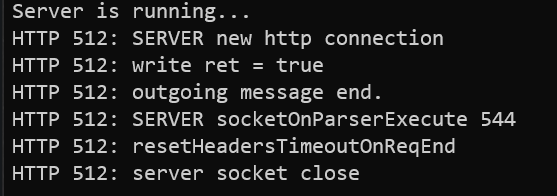
Sort of like, if you wanted to log all incoming and outgoing http requests related information, you can set the NODE_DEBUG variable to http - NODE_DEBUG="http"
I guess that’s all you need to get started.