Hey guys,
I tried out DBVisualizer earlier. I liked it and I have blogged about setting that up for your Vertica database. But it is expensive. I mean I can’t buy it for my personal use unless a company actually sponsors me. I’m a poor developer you see.
So I searched for alternatives and I kind of liked SQuirrel SQL client. It is a java based open source SQL client which is pretty awesome. First you should go and download it to know what I mean: http://squirrel-sql.sourceforge.net/.
Just like DBViz, SQuirreL too comes with a lot of in-built drivers to connect to your favourite DBMS technology but then we need to use only the ones that we care about. And here I specifically care about Vertica. So I am going to tell you how I got my SQuirreL client setup with Vertica.
The installation is pretty easy. So just follow on screen instructions and then we will get to work to set it up with your Vertica DB.
This is how your SQuirreL client would look like when you open it: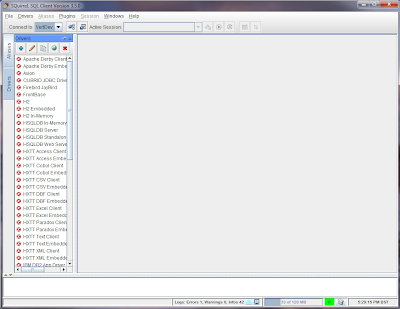
The steps to be taken are family similar to the ones you take when you configure DBVisualizer with Vertica. You start off with creating a database connection driver. And you already know that HP Vertica isn’t very common yet. It is a special database technology specifically for super large data sets for analytic purposes. So SQuirreL doesn’t come with a driver. You have to download the driver from https://my.vertica.com/download-community-edition/.
You don’t have to install the Vertica database server. What you need is the client side JDBC driver package. You could choose to install all of it or just the JDBC driver from the website. Installing the client package even lets you run VSQL on your command prompt. So choose what you need and get going.
The default installation of the driver should be done in the C:\Program Files\Vertica Systems\JDBC directory (unless you specified something else). The driver file is a jar (java archive) file. The version I have is named: vertica-jdk5-6.0.1-0.jar. You could have a later release depending on when you are doing this.
So we now have the Vertica driver and we also have SQuirreL. Let’s now get to setting this up.
In your SQuirreL Window go to the Drivers tab (button highlighted in red rounded rectangle in the below image).

So this is where you go to add or edit your driver. Click the + button to add a new driver (highlighted in red rounded rectangle in the below screenshot).

Now you should be presented with another window that looks something like this: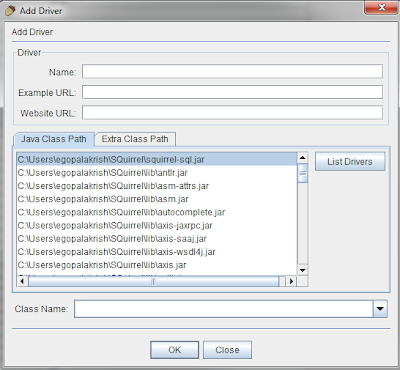
Well, you know what to fill in here I hope. You need a name for this new driver that you are about to create. I think Vertica sounds like a pretty decent name, what do you think? Then you have an example URL field and website URL field. An example URL would like this: jdbc:vertica://vertica01:5433/verticadb
For that matter I think jdbc: would suffice. Just like what you filled in for your DBViz Vertica setup. But if that doesn’t work, it doesn’t hurt to fill in the rest. To learn more about the JDBC connection string you can read this: http://home-1.worldonline.nl/~bmc88/java/sbook/032.html
I hope that link is valid when you click on it. If not I’ll just paste a summary below:
jdbc - is the protocol
vertica - driver name or sub protocol name
vertica01 - is the host name
5433 - is the port number
verticadb - is the name of the database or data source name
I know you will find more useful information from elsewhere.
Now after filling those two fields we move on to adding the downloaded Vertica driver to the extra class path. Click on the Extra Class Path tab (highlighted in red rounded rectangle in the below screenshot).
You should now see something like the screenshot below:
Well I have already added my extra class path which is why you see the path to the jar file there. So what you should do to get it there is click the add button and browse to the location of the vertica driver jar file which I suppose you have installed in the default location (C:\\Program Files\\Vertica Systems\\JDBC).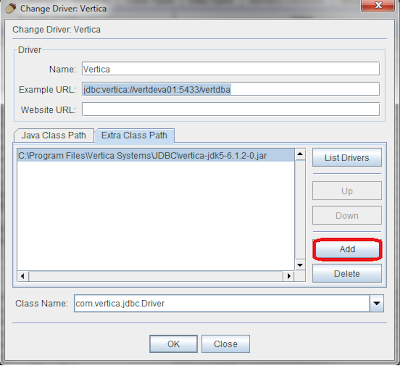
Now you have added the driver file. Did your class name appear in the Class Name drop down list? Nope? Or didn’t you follow my question? I mean did you get the field highlighted in RED rounded rectangle filled after adding the jar file? Screenshot below: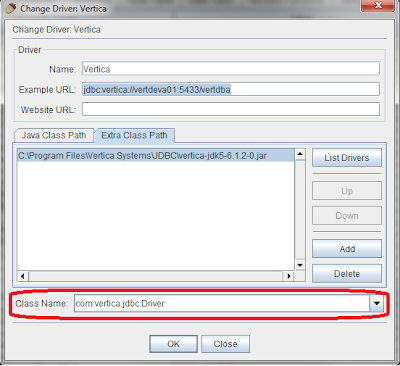
If not, then there isn’t much you could do about it. Just type in what I have written in there. That is the path to Driver class of that driver archive. And click on okay.
You have successfully created a driver to connect to your Vertica database.
Well it isn’t over yet. We need to create a connection alias that uses this driver to connect to our Vertica database. Click on the Aliases button highlighted again in a red rounded rectangle in the below screenshot.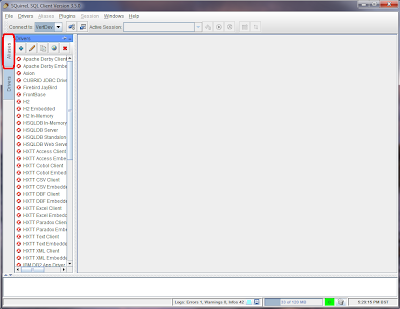
Now you should see something like the below screenshot.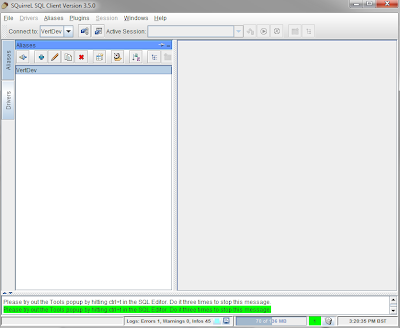
You may not have anything on the left side pane. Or you might have some aliases already, but yea what I intend to say is that your screen may not look exactly like what i have on my screen. So now you know what to do. You have to add a new connection alias. Click the + button on the left side pane (highlighted in red rounded rectangle) in the below screenshot.
Then you should get the following pop up: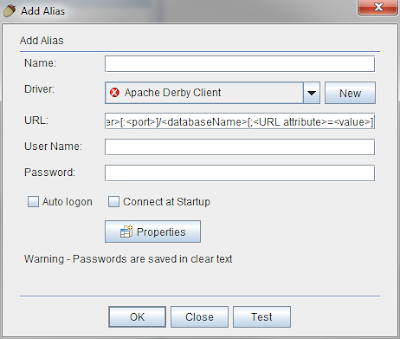
Now choose a Name for your connection alias. I think your Vertica Database name would be a pretty sensible one. Then choose a driver from the drop down menu. You should be able to pick up the Vertica Driver that you just added. Screenshot below for reference: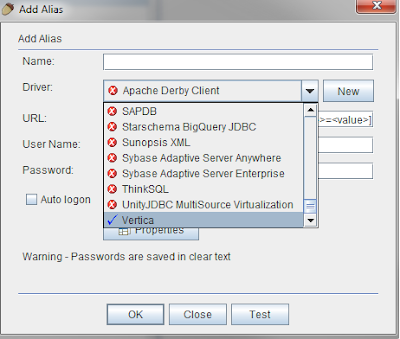
Once that is done. You can go ahead and type in the exact URL of the Vertica database connection. Remember the database connection URL that I explained a while ago. That is it.
Then your username and password. And click on okay. And you are done. Now double clicking the alias should connect you to your database.